Canning tomato sauce using a water bath – sounds a bit intimidating, right? Like a scene from a vintage cooking show, maybe with a slightly frantic narrator and a bubbling pot threatening to boil over. But trust me, it’s far more straightforward (and less chaotic!) than you might imagine. This isn’t some arcane culinary ritual; it’s a wonderfully rewarding way to preserve the vibrant taste of summer’s bounty, transforming juicy tomatoes into jars of deliciousness that will grace your pantry for months to come. We’ll walk through every step, from prepping those plump tomatoes to the satisfying *pop* of a perfectly sealed jar, ensuring your journey into home canning is both safe and surprisingly enjoyable. Get ready to roll up your sleeves, because this is one adventure you won’t want to miss!
Key Takeaways
- Canning tomato sauce water bath is a straightforward method to preserve summer tomatoes, offering a rewarding way to stock your pantry.
- Properly sterilizing jars and lids by boiling them for at least 10 minutes is crucial for eliminating bacteria and ensuring safety.
- Leaving the correct headspace (1/4 to 1/2 inch) and removing air bubbles before sealing helps create a vacuum seal.
- Maintaining a rolling boil in the water bath canner for the correct processing time, based on altitude, is vital for safety and preservation.
- Visual cues like flat, slightly dipped lids indicate a successful seal, while bulging lids signal a problem that requires attention.
Preparing Your Tomatoes and Equipment
Getting started with preserving your own tomato sauce is a fantastic way to enjoy the taste of summer all year long. It’s not as complicated as it might seem, and honestly, the flavor you get from homemade is just miles better than anything store-bought. Plus, you know exactly what's going into it – no weird fillers or extra sugar you don't want.
Selecting The Right Tomatoes
When you're picking tomatoes for sauce, think about the paste varieties like San Marzano or Roma. They have less water and more flesh, which means a thicker, richer sauce with less cooking time. But don't shy away from other ripe, flavorful tomatoes if that's what you have! A mix can be great too. Just make sure they're ripe and free from bruises or soft spots. You want good flavor from the start.
Essential Canning Equipment
To do this right, you'll need a few key things. First off, a big pot, often called a water bath canner, is a must. It needs to be deep enough to cover the jars with water by at least an inch or two. You'll also need canning jars, lids, and rings – make sure they're the kind made for canning, not just any old jar. A jar lifter is super handy for grabbing hot jars without burning yourself. A funnel that fits into the jar openings helps keep things tidy when you're filling them. And don't forget a large pot for cooking your sauce and bowls for prepping.
Here’s a quick rundown of what you'll want:
- Water bath canner (or a large, deep pot)
- Canning jars (pint or quart size)
- New lids and screw bands (rings)
- Jar lifter
- Canning funnel
- Large pot for cooking sauce
- Ladle
- Clean cloths or paper towels
Tomato Peeling Techniques
Getting the skins off your tomatoes is a step that makes a big difference in the final texture of your sauce. The easiest way is to blanch them. You just drop a few tomatoes at a time into boiling water for about 30 to 60 seconds, until you see the skins start to split. Then, quickly move them to a bowl of ice water. Once they're cool enough to handle, the skins should slip right off. It sounds like a bit of work, but it’s pretty satisfying when they peel so easily. You can find more details on preparing tomatoes if you need them.
Making your own tomato sauce might seem like a lot of effort at first, but the payoff in flavor and knowing exactly what you're eating is totally worth it. It connects you to your food in a way that buying from the store just can't match.
Mastering The Water Bath Canning Process
Water bath canning is a straightforward method for preserving high-acid foods like tomatoes. It involves submerging filled jars in boiling water, which creates a vacuum seal to prevent spoilage. This process is great for keeping the flavor and nutrients of your fresh tomatoes, letting you enjoy them all year long. It’s a fantastic way to make things like sauces, salsas, or even pickled tomatoes. Plus, sharing your homemade canned goods is always a nice touch.
Understanding Water Bath Canning Basics
Water bath canning is a simple and safe way to preserve foods with a high acid content, such as tomatoes. The basic idea is to put your filled jars into boiling water. This boiling water creates a vacuum seal, which is what keeps your food from going bad and preserves its taste and goodness. It’s a really good way to keep the flavor and nutrients from your fresh tomatoes, so you can enjoy them even when they’re not in season. You can use this method for all sorts of things, not just sauce – think salsas or pickled tomatoes too. And honestly, sharing your own canned goods is pretty satisfying.
Sterilizing Jars and Lids
Before you start filling jars, you need to make sure they’re clean and ready. This means sterilizing them. You can do this by boiling them in water for about 10 minutes. Make sure the jars are completely covered with water. For the lids, it’s usually best to just warm them up in hot, but not boiling, water right before you use them. This helps them seal properly. It’s important to have everything ready to go so you can move quickly from filling the jars to putting them in the canner.
Filling Jars and Headspace
When you’re filling your jars with tomato sauce, leaving the right amount of space at the top, called headspace, is really important. Too little space, and the jars might not seal right. Too much, and you risk spoilage. You want to leave about 1/4 to 1/2 inch of space. Use a ladle to fill the jars with hot sauce, being careful to keep that headspace consistent in each jar. It’s like giving your sauce a little room to expand safely during the canning process. After filling, you’ll want to get rid of any air bubbles. You can do this by running a thin, non-metallic utensil, like a chopstick or a plastic spatula, around the inside edge of the jar. This releases trapped air and helps with a good seal. Once the bubbles are gone, wipe the rims of the jars with a clean, damp cloth to remove any sauce or bits that could interfere with the seal. Then, place the lids on and screw on the bands until they are fingertip-tight. Don’t crank them down too hard; just snug is perfect. This allows the lid to pop down and create that seal as the jar cools. Remember to check out how to make dewberry jelly for another great preserving project!
Processing Your Tomato Sauce
Now that your delicious tomato sauce is ready and your jars are prepped, it's time for the main event: getting it safely into those jars and through the water bath. This is where the magic of preservation really happens, turning your fresh harvest into something that will last.
Removing Air Bubbles
Before you seal up those jars, you need to get rid of any trapped air. Air bubbles can mess with the seal and even lead to spoilage. Just take a clean spatula or a special canning tool and gently run it around the inside edge of the jar, between the sauce and the glass. You'll see little bubbles rise to the top. Keep doing this until most of them are gone. It’s a simple step, but it makes a big difference in how well your sauce preserves.
Wiping Jar Rims and Applying Lids
This step is super important for getting a good seal. You need to make sure the rim of each jar is perfectly clean. Any bits of sauce, tomato pulp, or even a smudge of oil can stop the lid from sealing properly. Grab a clean, damp cloth or paper towel and wipe each rim carefully. Then, place the flat lid on top of the clean rim. Screw on the band just until it's fingertip tight. Don't crank it down hard; just snug is good. Too tight and the air can't escape during processing.
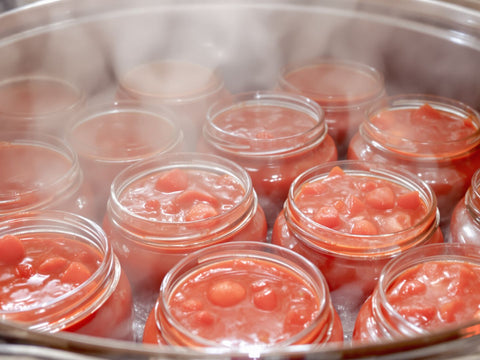
Processing Jars in The Water Bath Canner
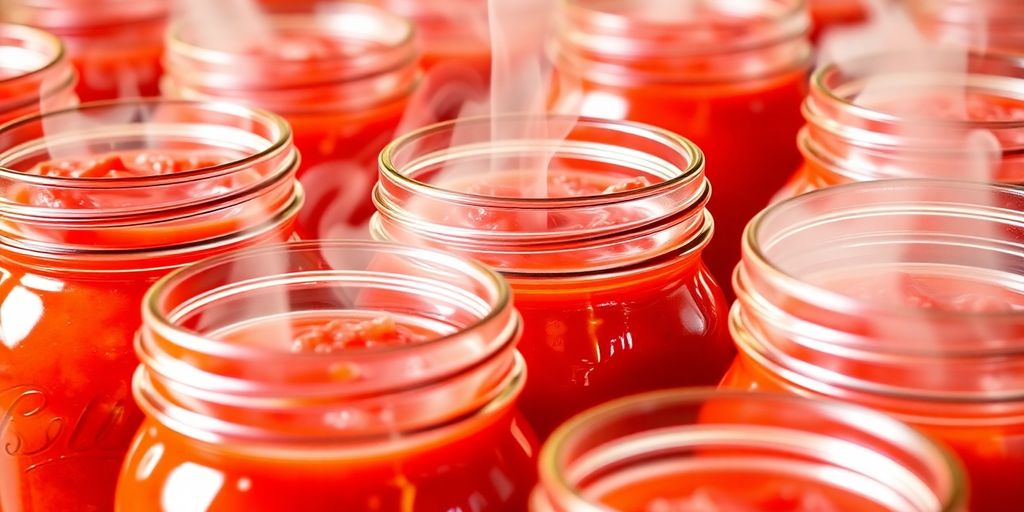
Get your water bath canner ready. Make sure it's filled with enough water so that the jars will be covered by at least an inch or two of water once they're in. Bring the water to a rolling boil. Carefully place your filled jars into the boiling water, using a jar lifter. Make sure the jars aren't touching each other or the sides of the canner. Once all the jars are in, put the lid on the canner and start your timer. For pint jars of tomato sauce, you'll typically process them for 35 minutes, and for quart jars, it's usually 40 minutes. Remember to adjust this time if you're at a higher altitude. You can find charts online that help you figure out the correct processing time based on your elevation. After the time is up, turn off the heat, remove the canner lid, and let the jars sit in the hot water for another 5 minutes. This helps prevent siphoning, where sauce might bubble out of the jars. Then, carefully lift the jars straight up out of the canner using your jar lifter and place them on a towel-lined counter or a cooling rack. Let them sit undisturbed for 12 to 24 hours. You might hear some satisfying 'ping' sounds as the lids seal – that's a good sign!
Ensuring A Successful Seal
The Importance of Proper Headspace
Headspace is that little bit of empty space between the top of your tomato sauce and the lid of the jar. It’s not just for show; it’s actually pretty important for getting a good seal. When you process your jars in the boiling water bath, the food inside expands. If there’s not enough room for that expansion, the sauce can push past the lid, making it hard for a vacuum seal to form. Too much headspace, on the other hand, can sometimes lead to a weak seal or even spoilage if the lid doesn’t quite seal tight enough. For most tomato sauces, you’ll want to aim for about a quarter to a half-inch of headspace. Always check your specific recipe for the exact amount, as it can vary slightly.
Achieving A Tight Seal
Getting that satisfying 'pop' and a tight seal on your jars is the goal. After you’ve filled your jars and wiped the rims clean – seriously, don’t skip wiping the rims, any little bit of sauce or food can stop a seal from happening – you’ll put on the lids and screw on the bands. Just tighten them until they feel snug, what we call 'fingertip tight.' Don't crank them down with all your might; that can actually prevent the air from escaping during processing, which is what creates the seal. Once they’re processed and cooling, you’ll start to hear those little pops. That’s the sound of success!
Visual Cues of A Successful Seal
So, how do you know for sure if your jars are sealed? After the jars have cooled completely, usually overnight, you can check them. The best way is to gently press the center of the lid. If the lid doesn't flex or pop up and down when you press it, it's sealed. Another good sign is that the lid itself will look slightly concave, like it’s pulled down into the jar. If you remove the ring band (which you should do for storage anyway, to prevent rust and allow you to spot a failed seal later), the lid should stay firmly in place. If you can easily lift the lid off, or if it flexes when you press it, that jar didn’t seal properly. Don’t worry if a jar doesn’t seal; just pop it in the fridge and use that sauce within a week or two. You can always try re-processing it with a new lid, but make sure to check for any obvious reasons it didn’t seal the first time, like insufficient headspace or debris on the rim. For more tips on checking seals, you can look at how to check seals.
Troubleshooting Common Canning Issues
So, you've gone through the whole process, and maybe a jar or two didn't seal, or perhaps you're seeing something a bit off. Don't panic! It happens to the best of us, and usually, there's a straightforward fix or a lesson learned for next time. It’s all part of becoming a canning pro.
Addressing Lids That Don't Seal
This is probably the most common issue folks run into. If a jar lid doesn't pop down and seal, it means a vacuum didn't form. This can happen for a few reasons. Maybe there wasn't enough headspace, or perhaps some food residue got on the rim of the jar, stopping the lid from making a good connection. Over-tightening the lid band can also be a culprit, as it doesn't allow air to escape properly during processing. Even a slightly bent or old lid can cause problems. The most important thing is not to try and re-process a jar that didn't seal unless you're absolutely sure you can fix the specific issue and re-process immediately. If you find a jar didn't seal, the safest bet is to refrigerate it and use the contents within a week or two. You can also reprocess it with a new lid and band, but you must bring the water back to a boil and process for the full recommended time. Just remember to check your equipment and process carefully next time.
Preventing Spoilage
Spoilage is what we're all trying to avoid, right? Signs like mold, discoloration, or bubbling in the jar mean something went wrong. This usually points back to a seal failure or not processing the jars long enough. If you see any of these signs, it's a definite no-go. Never taste food from a jar that looks or smells suspicious. Just toss it. To prevent this, always start with fresh, good-quality ingredients. Make sure your jars and lids are super clean, follow the headspace rules precisely, and stick to the processing times. It’s better to be safe than sorry when it comes to preserving food. If you're curious about adjusting recipes, this guide on how to safely modify home canning recipes can be a good resource.
Recognizing Improperly Processed Jars
How can you tell if a jar wasn't processed right, even if it looks okay at first glance? Well, the seal is the main thing. After the jars have cooled for 12-24 hours, you should press the center of the lid. It shouldn't flex up and down. If it does, it's not sealed. You might also notice the lid is slightly bulging, which is a bad sign. Sometimes, even if a jar seems sealed, if you open it later and the contents look or smell off, it wasn't processed correctly. It's a good idea to check your jars before storing them long-term. If you're unsure about a jar, it's always best to refrigerate it and use it up quickly.
Canning is a science, but it's also a bit of an art. Sometimes things don't go perfectly, and that's okay. The key is to learn from any issues and adjust your technique for the next batch. Don't get discouraged; keep practicing, and you'll get the hang of it!
Enhancing Your Tomato Sauce
So, you've successfully canned your tomato sauce, and it tastes great as is. But why stop there? Making your own sauce is a fantastic starting point for all sorts of culinary adventures. You can really play around with the flavors to make it your own. It’s like having a blank canvas, but for food!
Flavor Variations for Tomato Sauce
Think about what you like to eat. Do you enjoy a little heat? Maybe some smoky notes? Or perhaps you prefer something really fresh and herby? You can achieve all of this by adding different ingredients during the cooking phase before you can it. For example, adding a pinch of smoked paprika and a dash of chipotle powder can give your sauce a nice, warm kick. If you’re going for an Italian vibe, fresh basil, oregano, and a bit of thyme are always winners. Don't be afraid to experiment with different combinations. A good starting point is to sauté some onions and garlic in olive oil before adding your tomatoes; this builds a really nice flavor base.
Remember, the goal is to create a sauce that you’ll love eating, so don't be shy about adding your favorite seasonings. Just be mindful of how these additions might affect the acidity and processing time, though for most herbs and spices, it's usually not an issue.
Adding Herbs and Spices
Herbs and spices are your best friends when it comes to jazzing up tomato sauce. They can completely change the character of your sauce. Here are a few ideas to get you started:
- Italian Classic: Fresh basil, oregano, thyme, a bay leaf, and a pinch of red pepper flakes for a little warmth.
- Spicy Kick: Cayenne pepper, chili powder, smoked paprika, and maybe a diced jalapeño.
- Mediterranean Flair: Rosemary, marjoram, a little bit of cumin, and perhaps some chopped olives.
- Smoky BBQ: Smoked paprika, a touch of liquid smoke (use sparingly!), brown sugar, and a splash of apple cider vinegar.
When adding fresh herbs, it's often best to add them towards the end of the simmering process to keep their flavor bright. Dried herbs can go in earlier to allow their flavors to meld. You can even reduce store-bought tomato sauce on the stove to concentrate its flavor, which is a great technique to try before you even start canning concentrate flavor.
Don't forget about salt and pepper, either! They really do make a difference in bringing out all the other flavors. Taste as you go and adjust until it's just right. Happy canning and happy eating!
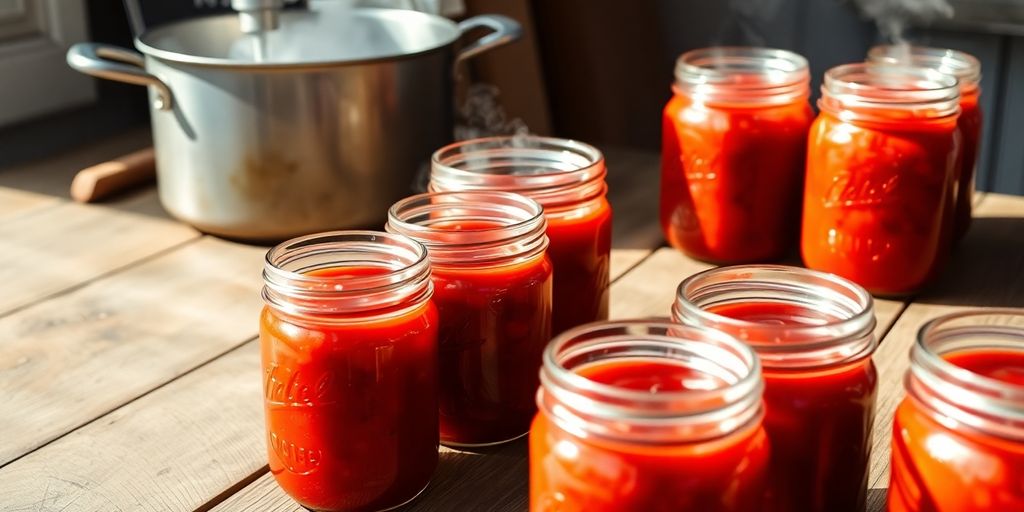
Your Pantry Awaits!
So there you have it! You’ve taken those fresh tomatoes and turned them into jars of delicious, homemade sauce, ready to be enjoyed whenever the craving strikes. It might have seemed a bit much at first, but you did it. That satisfying pop when you open a jar later on is a pretty great feeling, isn't it? It’s a simple way to keep a bit of summer’s goodness around, and honestly, it tastes so much better than anything from a store. Now your pantry is stocked, and you’ve got a new skill under your belt. Go ahead, admire those jars – you’ve earned it!
Frequently Asked Questions
What supplies do I need for water bath canning tomato sauce?
You'll need a big pot or a special water bath canner with a rack inside. Also, grab some glass jars made for canning, like Mason jars, along with their lids and rings. Don't forget canning salt, and maybe something to test acidity if you want to be extra careful. And of course, lots of ripe tomatoes!
Why is sterilizing jars and lids so important?
It's super important to make sure your jars and lids are clean and germ-free. Wash them well with hot, soapy water. Then, boil them in water for at least 10 minutes. This kills any tiny germs that could make your sauce go bad.
What is headspace, and why does it matter?
Headspace is the little bit of empty space between the top of your sauce and the lid. You want to leave about 1/4 to 1/2 inch. This gives the sauce room to expand when it's heated, which helps the jar seal properly. Too much or too little can cause problems.
How do I actually process the jars in the water bath?
After you've filled your jars and put on the lids, you place them in the boiling water. The water needs to cover the jars by 1-2 inches. You keep it boiling for a specific amount of time, usually around 35 minutes for pint jars, but this can change depending on how high up you live.
How can I tell if my jars sealed correctly?
A good seal means the lid is slightly curved inward, like a little dip in the middle. You won't be able to press down on it, and it won't pop up and down. If the lid is bulging or looks loose, it didn't seal right.
What should I do if a jar doesn't seal properly?
If a lid didn't seal, the best thing to do is put that jar in the fridge and use it soon. You can also try re-processing it right away with a new lid, making sure everything is clean and you have the right headspace. If your sauce looks or smells funny, it's best to throw it out to be safe.