


Making pizza at home can feel like a big project, but it doesn't have to be. This guide focuses on quick rise yeast pizza dough, which means you can get from mixing bowl to oven in about 90 minutes. We'll cover everything you need to know, from picking the right ingredients to getting that perfect crust. Forget waiting around for hours; we're talking fast, flavorful, and totally doable homemade pizza. Get ready to impress yourself (and anyone lucky enough to share).
Key Takeaways
- Using warm water between 100-110°F is key to waking up your active dry yeast. Too hot, and you'll kill it; too cold, and it won't get going.
- Active dry yeast needs a little sugar and warm water to get foamy before you mix it into the dough. Instant yeast can be mixed right in with the dry ingredients.
- Don't over-flour your dough! A little flour on your hands and surface is fine, but too much makes the dough dry and tough.
- The dough is ready when it's doubled in size and springs back gently when poked. If it snaps back too fast, give it a few more minutes.
- For an even tastier crust, try letting the dough rise slowly in the fridge overnight. It really makes a difference in flavor and texture.
Understanding Quick Rise Yeast Pizza Dough Ingredients
Alright, let's talk about what goes into making a fantastic quick rise pizza dough. It's not just about throwing things in a bowl; each ingredient plays a part in getting that perfect crust. We're aiming for something that's easy to work with, tastes great, and bakes up beautifully, all without taking hours.
The Role Of Warm Water In Yeast Activation
Water is the lifeblood for our yeast. But it's not just any water; it needs to be warm. Think of it like a cozy bath for the yeast – not too hot, not too cold. If the water is too hot, you'll actually kill the yeast, and then your dough won't rise at all. Too cold, and the yeast just won't wake up and do its job. The sweet spot is usually between 100-110°F (38-43°C). If you don't have a thermometer, just test it on your wrist; it should feel comfortably warm, like a nice bath.
Choosing The Right Yeast: Active Dry vs. Instant
This is a common point of confusion, but it's pretty straightforward. For this quick rise recipe, we're specifically using active dry yeast. This type needs a little coaxing to get going. You'll mix it with the warm water and a pinch of sugar, and let it sit for about five to ten minutes until it gets foamy and bubbly. This 'blooming' process shows that the yeast is alive and ready to work. Instant yeast, on the other hand, can be added straight to the dry ingredients and doesn't need this blooming step. While you can use instant yeast for a faster dough, active dry yeast, with its slight blooming period, often contributes a bit more depth of flavor to the final crust.
Essential Additions For Flavor And Texture
Beyond the yeast and water, a few other players make a big difference:
- Flour: All-purpose flour is perfectly fine here. You don't need fancy '00' flour for a great quick rise dough. Just make sure you measure it correctly – spooning it into the cup and leveling it off is better than scooping directly from the bag, which can pack too much in.
- Sugar: A little bit of sugar does two things. First, it gives the yeast something to eat during the blooming process, helping it get active. Second, it helps the crust turn a lovely golden brown when baking.
- Salt: Don't skip the salt! It's not just for flavor, preventing a bland crust, but it also helps control the yeast's activity. It's best to mix it with the flour before adding the wet ingredients to avoid it directly killing the yeast.
- Olive Oil: A tablespoon or so of olive oil adds a nice richness, keeps the dough soft and pliable, and contributes to that desirable golden color on the crust.
The magic of quick rise dough is in its simplicity and speed. By understanding what each ingredient does, you can troubleshoot any issues and consistently get a dough that's easy to handle and bakes up wonderfully.
Mastering The Quick Rise Yeast Pizza Dough Process
Getting your quick rise pizza dough just right is all about giving the yeast a happy environment to do its thing. It’s not complicated, but a few key steps make all the difference between a flat, sad crust and a wonderfully airy one.
Activating The Yeast For Optimal Growth
This is where the magic starts. You'll need warm water – think bathwater temperature, around 100-110°F. Too hot and you'll kill the yeast; too cold and it won't wake up. In a bowl, combine your warm water with a pinch of sugar and your active dry yeast. Give it a gentle stir and let it sit for about 5 to 10 minutes. You're looking for a foamy, bubbly layer to form on top. If you don't see this, your yeast might be old, or the water wasn't quite right, and you'll need to start over. This foamy cap is your sign that the yeast is alive and ready to work.
Combining And Kneading The Dough
Once your yeast is happily frothing, it's time to bring everything together. In a large bowl or the bowl of your stand mixer, combine your flour and salt. Make a little well in the center and pour in your activated yeast mixture and a tablespoon of olive oil. If you're using a stand mixer, attach the dough hook and start on low speed. If you're mixing by hand, use a sturdy spoon or your hands. Mix until a shaggy dough forms. Then, it's time to knead. This develops the gluten, which gives your crust its structure and chew. Knead for about 5-8 minutes on a lightly floured surface (or in the mixer on medium-low speed) until the dough is smooth and elastic. It should feel slightly tacky but not stick to your fingers.
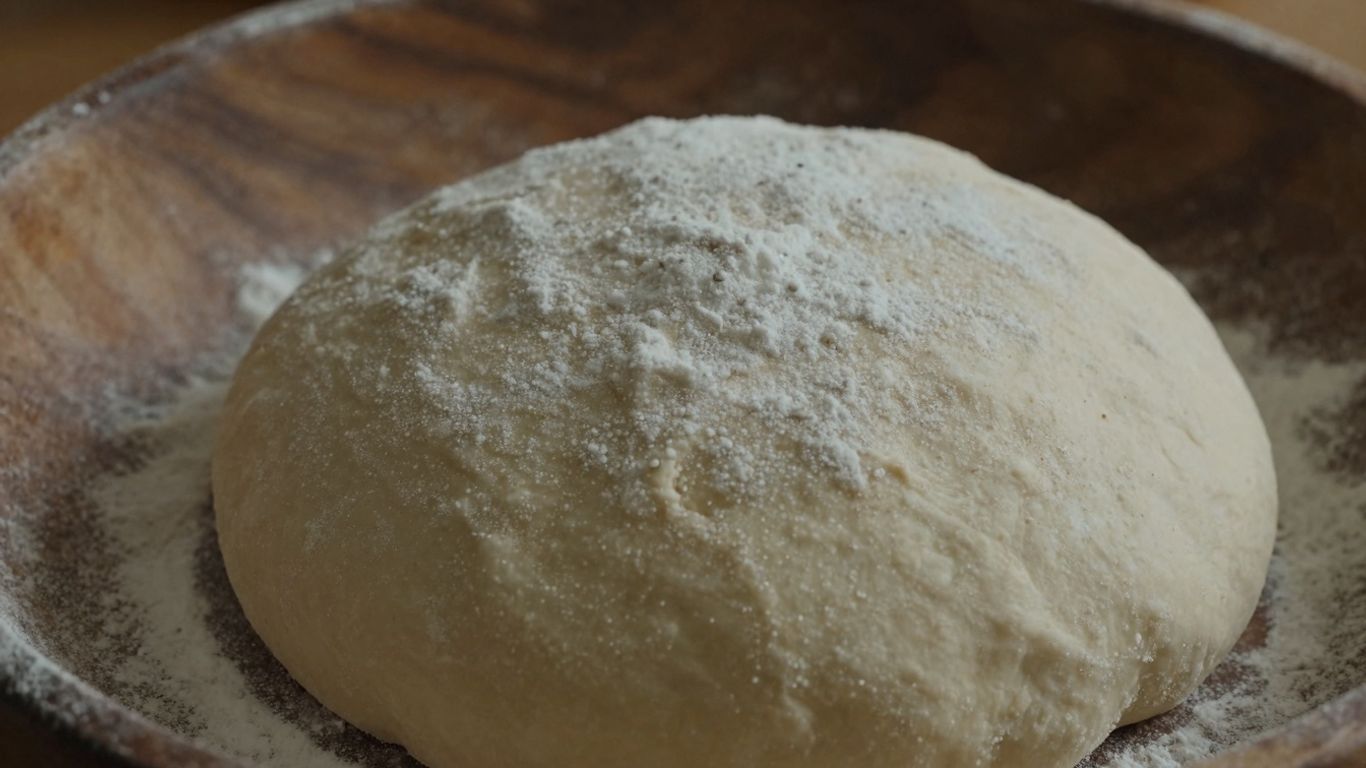
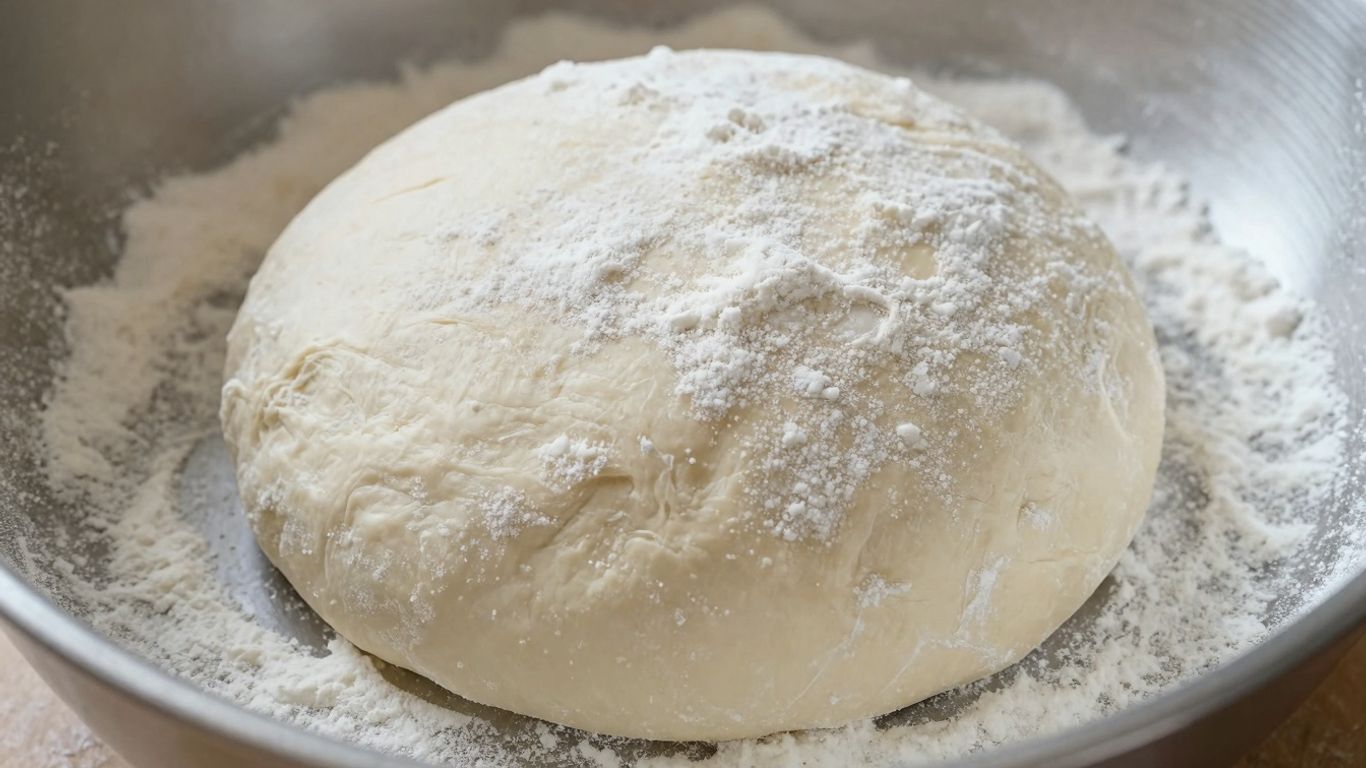
The Importance Of A Proper Rise
After kneading, the dough needs to rest and rise. Lightly oil a clean bowl, place the dough ball inside, and turn it to coat. Cover the bowl tightly with plastic wrap or a damp kitchen towel. Find a warm, draft-free spot in your kitchen – the top of the fridge or a slightly warm oven (turned off!) works well. Let it rise for about 45 minutes to an hour, or until it has visibly doubled in size. This rise is where the dough gets its airy texture. Don't rush it! A good rise means a better crust.
Rushing the rise is a common mistake. Yeast needs time to produce those little air pockets that make pizza dough light and chewy. Patience here really pays off in the final product.
Signs Your Quick Rise Yeast Pizza Dough Is Ready
So, you've been patient, letting that dough do its thing. How do you know it's actually ready to become pizza? It's not just about waiting a certain amount of time; there are a few key indicators to look for.
Visual Cues For A Perfectly Risen Dough
First off, take a good look at your dough. It should have visibly puffed up and nearly doubled in size since you put it in the bowl. If you used a clear bowl and marked the starting level, you should see it well above that line. The surface should look soft and airy, not dense or flat. It's like a little doughy cloud.
The Spring-Back Test For Dough Readiness
This is a classic test for a reason. Gently poke the dough with a floured finger. If the indentation springs back immediately, it might need a little more time. If it springs back slowly and leaves a slight impression, that's a good sign. If it stays put, it's likely ready to go. If it springs back too fast, just cover it up and let it rest for another 5-10 minutes. The gluten needs a bit more time to chill out.
Assessing Dough Texture For Shaping
When you gently touch the dough, it should feel soft and slightly tacky, but not overly sticky. It should also be pliable and easy to stretch without tearing. If it feels too stiff or rubbery, it might not have risen enough. If it feels too wet and sticky, you might have had a bit too much liquid or not enough flour. The goal is a dough that feels alive and ready to be shaped into your pizza masterpiece.
Shaping And Baking Your Quick Rise Pizza
Alright, so you've got this beautiful, puffy dough ready to go. Now comes the fun part: turning it into a pizza! Don't overthink this; it's not as complicated as it might seem. The goal is to get it into a nice, round shape without deflating all those lovely air bubbles we worked so hard to create.
Effortless Dough Stretching Techniques
Forget the rolling pin. Seriously. Using one just squishes out all the air, and we want a light, airy crust, right? Instead, grab your dough and place it on a lightly floured surface. Start by gently pressing down with your fingertips, working from the center outwards. Then, you can use the backs of your hands or your knuckles to gently stretch the dough into a circle. If it keeps springing back, just cover it with a clean towel and let it rest for about 5-10 minutes. The gluten just needs a little more time to relax. Aim for about a 12-inch circle, leaving a slightly thicker edge for that classic pizza crust look. You can find some helpful tips on how to make pizza dough if you need a refresher on the whole process.
Achieving A Crispy Crust With High Heat
This is where the magic happens. Quick rise dough bakes best at a high temperature. Preheat your oven to at least 450°F (230°C), or even higher if your oven goes there. A screaming hot oven is key to getting that crispy bottom and nicely browned edges. Slide your shaped dough onto a parchment-lined baking sheet or a preheated pizza stone. Don't overload it with sauce or toppings, as this can make the crust soggy. Less is often more here.
Topping Your Homemade Pizza Creation
Now for the best part – toppings! Spread your sauce evenly, leaving that thicker edge bare. Add your cheese, and then pile on your favorite ingredients. Just remember, a hot oven means a quick bake, usually around 12-15 minutes. Keep an eye on it; you're looking for golden brown crust and bubbly, melted cheese. It's that simple!
Here's a quick rundown of what to aim for:
- Dough Shape: Roughly 12-inch circle with a slightly thicker rim.
- Oven Temp: 450°F (230°C) or higher.
- Bake Time: 12-15 minutes.
- Desired Result: Golden crust, bubbly cheese.
Baking at high heat is the secret to a fantastic crust. It cooks the dough quickly, creating a crispy exterior while keeping the inside tender and chewy. Don't be afraid of a hot oven; your pizza will thank you for it.
Enhancing Flavor With Advanced Dough Techniques
So, you've got the quick rise down, and your pizza is tasting great. But what if you want to take that flavor to the next level? Sometimes, the fastest way isn't always the most flavorful. Let's talk about giving your dough a little more time to develop some serious taste.
The Benefits Of An Overnight Cold Fermentation
Think of cold fermentation like letting a good story unfold slowly. When you let your pizza dough hang out in the fridge overnight, or even for a couple of days, something pretty cool happens. The yeast, which usually works fast at room temperature, slows way down. This slower pace gives the yeast more time to break down the flour's proteins and sugars. What does that mean for you? A crust that's not just airy, but also has a much more complex and satisfying flavor. It's like the difference between a quick chat and a deep conversation – you get more out of the latter.
Maximizing Flavor With A Slower Rise
Even if you don't have a full 24 hours, a slightly longer, slower rise can make a big difference. Instead of just an hour, try letting your dough rise for 2-3 hours at room temperature, or even a shorter stint in the fridge (like 4-6 hours). This gives the yeast a bit more breathing room to work its magic. You'll notice a subtle but definite improvement in the dough's taste and texture. It's all about patience – letting the ingredients do their thing without rushing them.
Preparing Dough For Extended Storage
Got extra dough and want to save it for later? Cold fermentation is your best friend here. After you've mixed and kneaded your dough, pop it into a lightly oiled, covered bowl and stick it in the refrigerator. It can keep well for up to 3 days. The flavor actually continues to develop over this time. When you're ready to use it, just take it out of the fridge about an hour before you plan to shape and bake it. This lets it come back to room temperature, making it easier to handle and ready for its pizza destiny.
Letting your dough rest in the cold for an extended period transforms its character. The slow breakdown of starches and proteins creates nuanced flavors that a quick rise simply can't replicate. It's a simple step that yields a remarkably more delicious pizza crust.
Pro Tips For Perfect Quick Rise Yeast Pizza Dough
Alright, let's talk about making sure your quick rise pizza dough turns out amazing every single time. It's not rocket science, but a few little tricks can make a big difference. Pay attention to the details, and you'll be rewarded with fantastic pizza.
Accurate Ingredient Measurement For Consistency
This is probably the most important tip I can give you. Measuring by weight is way more accurate than using cups, especially for flour. Flour can pack down in the cup, meaning you could end up with way too much, making your dough dry and tough. If you don't have a scale, here's how to measure flour properly:
- Fluff up the flour in its container with a spoon.
- Gently spoon the flour into your measuring cup.
- Level off the top with the straight edge of a knife or spatula.
Never scoop directly from the bag or container.
Here's a quick look at typical ingredient amounts for a standard pizza dough, but remember, weighing is best:
| Ingredient | Weight (grams) | Volume (approx.) |
|---|---|---|
| Flour | 300g | 2.5 cups |
| Water | 190g | 3/4 cup |
| Yeast | 7g | 2.25 tsp |
| Salt | 6g | 1 tsp |
| Olive Oil | 15g | 1 tbsp |
| Sugar | 5g | 1 tsp |
Avoiding Common Dough-Making Pitfalls
Lots of things can go wrong, but most are pretty easy to fix if you know what to look for. Don't let a little hiccup derail your pizza night!
- Dough too sticky? Resist the urge to dump in a ton more flour. Instead, lightly flour your hands and the work surface. Knead for a few more minutes; it often comes together. If it's still unmanageable, add flour just a tablespoon at a time.
- Dough too dry and crumbly? Add water, a teaspoon at a time, until it starts to come together. Be patient; it might take a minute for the water to incorporate.
- Yeast not bubbling? Double-check your water temperature (too hot kills yeast, too cold makes it sluggish) and the yeast's expiration date. If it's dead, you have to start over with fresh yeast.
If your dough springs back aggressively when you try to stretch it, it just means the gluten needs a little more time to relax. Cover it back up and let it rest for another 5-10 minutes. It's like giving it a little break before you ask it to do more work.
Doubling The Recipe For Extra Pizzas
Got a crowd coming over, or just really love pizza? Doubling the recipe is simple. Just multiply all your ingredients by two. You'll want to keep the amount of yeast the same or maybe add just a tiny bit more (like an extra half teaspoon) if you're in a hurry. The dough will likely take a bit longer to rise, maybe an extra 15-30 minutes at room temperature, but that slower rise can actually build even more flavor. You can also divide the doubled batch into two and let one rise while the other chills in the fridge for a day, which is a great way to prep ahead.
Enjoy Your Homemade Pizza!
So there you have it – a super simple way to get amazing pizza dough without all the fuss. We went over how to get that yeast going just right, how to know when your dough is ready to go, and even a little trick for making it taste even better if you have the time. No fancy moves needed, just a little patience and you'll be making pizza that's way better than delivery. Now go ahead, top it with your favorites, and enjoy a slice of pure homemade happiness. Let me know what toppings you end up using!
Frequently Asked Questions
How do I know when my pizza dough is ready to use?
Your dough is ready when it has puffed up and looks like it's almost doubled in size. It should feel soft and airy. A good trick is to mark the starting level of the dough in a clear bowl before it rises. After about an hour, it should be noticeably higher than your mark.
Can I make the dough ahead of time?
Absolutely! For even more flavor, you can let the dough rise slowly in the refrigerator overnight. Just mix it up, put it in an oiled bowl, cover it, and chill it for up to 18 hours. Let it sit on the counter for about an hour before you shape it so it's easier to work with.
What's the difference between active dry yeast and instant yeast?
Active dry yeast needs to be 'woken up' in warm water with a little sugar until it gets foamy. Instant yeast can be mixed right in with the dry ingredients. While instant yeast can make the dough rise a bit faster, active dry yeast often gives a deeper flavor because it has a bit more time to work.
Do I need any special tools to shape the dough?
Not at all! You don't need fancy techniques. Just gently punch down the risen dough, put it on a lightly floured surface, and stretch it into a circle. Use the backs of your hands or your knuckles to stretch it out evenly without poking holes. Avoid using a rolling pin, as it can flatten out the air bubbles.
What makes the crust crispy?
A super-hot oven is key! Preheat your oven really well, even a few minutes longer than it says it's ready. This intense heat helps the crust puff up quickly, making it crispy on the outside while staying chewy inside.
Can I double the recipe to make more pizza?
Yes, you can easily double the recipe! Just double all the ingredients except the yeast. Then, divide the dough into two equal parts. It might take a little longer to rise, about 90 minutes to 2 hours, but this slower rise can actually add even more flavor.


