


Baking your own focaccia bread at home can seem a little intimidating, but honestly, it's way simpler than you might think. This focaccia recette is designed to be super easy, even if you've never baked bread before. We're talking soft, airy insides with a nice crispy crust, all thanks to a few basic ingredients and a little bit of patience. Get ready to impress yourself (and maybe your friends!) with some delicious homemade Italian bread.
Key Takeaways
- Focaccia is a flat, oven-baked Italian bread known for its dimpled surface and rich olive oil flavor.
- The best focaccia relies on simple ingredients: flour, yeast, olive oil, and salt.
- A sticky, wet dough is key to achieving the signature airy texture; avoid adding too much extra flour.
- Allowing the dough ample time to rise, whether at room temperature or through cold fermentation, develops flavor and airiness.
- Generous use of olive oil and a hot oven are important for that perfect golden, crispy crust.
Understanding Focaccia Bread
What Is Focaccia?
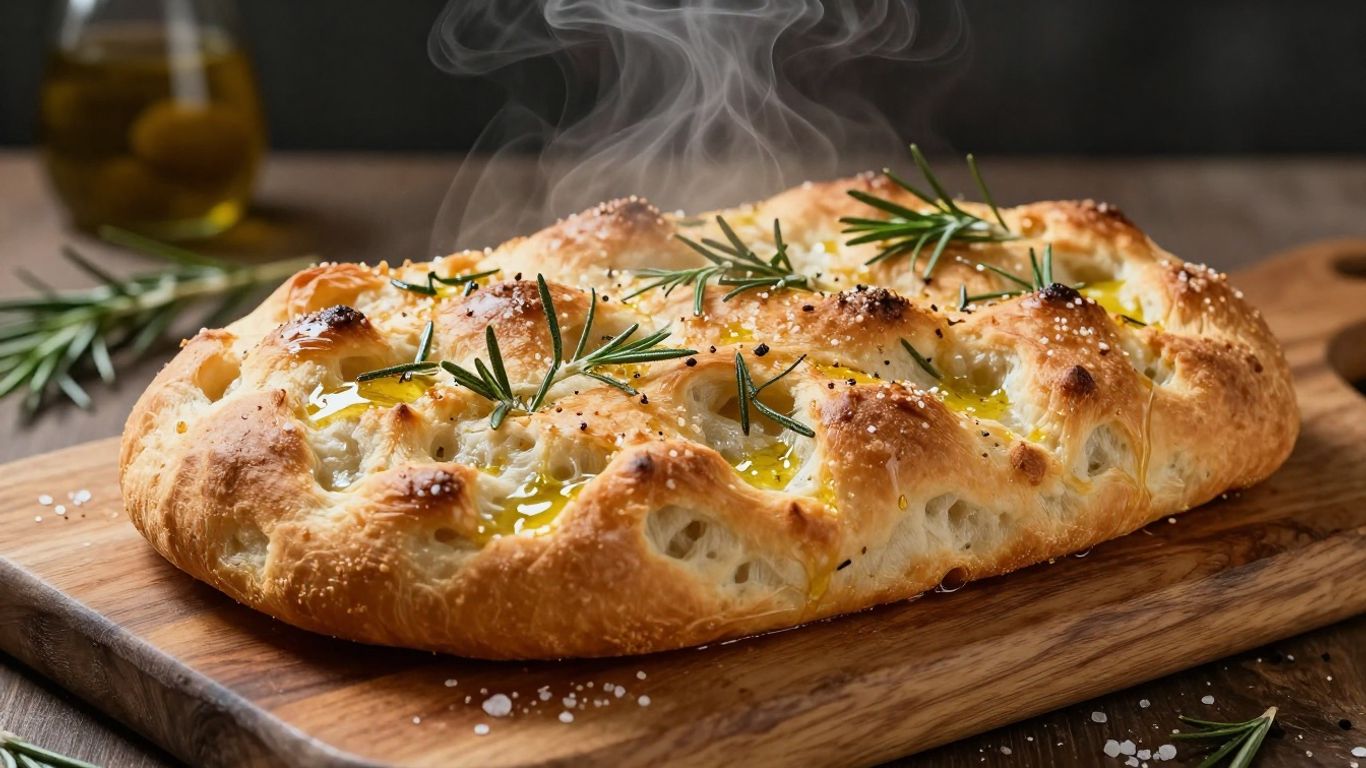
Focaccia, pronounced 'foh-KAH-chuh', is a wonderfully versatile Italian flatbread. It's known for its soft, airy interior and a delightfully crisp crust, often glistening with olive oil. Think of it as a rustic, flavorful cousin to pizza dough, but baked without toppings in the pan, or sometimes with simple additions like herbs or salt. It's the kind of bread that's perfect for dipping, sandwich making, or just enjoying on its own.
A Brief History of Focaccia
The origins of focaccia stretch way back, possibly even to ancient Rome or Etruria. Early versions were likely simple flatbreads baked on hot stones or in rudimentary ovens. Archaeological findings suggest that a basic dough of flour and water was being baked at high temperatures quite early on, hinting that focaccia, or something very similar, might be older than we often assume. It's a bread with deep roots, evolving over centuries into the beloved version we know today.
Key Characteristics of Focaccia
What makes focaccia, well, focaccia? It really comes down to a few key things:
- Dough Composition: It's typically made with a high-hydration dough, meaning it has a lot of water relative to the flour. This is what gives it that signature airy texture.
- Olive Oil: Generous amounts of olive oil are mixed into the dough and used to coat the pan. This contributes to its rich flavor and helps create that desirable crispy bottom and edges.
- Dimpled Surface: Before baking, the dough is dimpled with fingers. This creates little pockets that hold onto olive oil and any toppings, adding visual appeal and extra flavor.
- Texture: The goal is a bread that's light and chewy inside, with a satisfyingly golden and slightly crunchy exterior. It's a delightful contrast that makes each bite interesting.
The beauty of focaccia lies in its simplicity and adaptability. While classic versions focus on olive oil and sea salt, the dough itself is a fantastic canvas for a wide array of flavors and ingredients.
Essential Ingredients For Your Focaccia Recette
Alright, let's talk about what you'll need to get this focaccia party started. It's really not complicated, just a few key players that make all the difference. Think of these as your trusty sidekicks in the quest for perfect Italian bread.
Flour: The Foundation Of Your Dough
This is where it all begins. For focaccia, you generally want a good all-purpose flour. It gives you that nice, soft crumb we're aiming for. Some folks like to use bread flour for a chewier texture, and that works too, just use the same amount. If you have a kitchen scale, now's the time to break it out. Measuring flour by weight is way more accurate than using cups, which can lead to packing too much in. Trust me, getting the flour measurement right sets you up for success.
Yeast: The Key To A Light Rise
This little guy is what makes your dough puff up and become airy. You'll typically use active dry yeast or instant yeast. If you're using active dry, you'll want to wake it up first in some warm water – think around 110°F (43°C). If it gets foamy, it's ready to go. Instant yeast can usually be mixed right in with the dry ingredients, but always check your package. The yeast is what gives the bread its structure and that lovely, light texture.
Olive Oil: For Richness And Crispiness
Don't be shy with the olive oil here. It's not just for flavor, though it adds a ton of that rich, Italian goodness. Olive oil also helps create those wonderfully crispy edges and adds moisture to the dough. You'll use some in the dough itself, and then you'll want to be generous when you're prepping your pan and finishing the bread. Extra-virgin is the way to go for the best taste.
Salt: Enhancing Every Flavor
Salt is a flavor booster, plain and simple. It brings out the best in all the other ingredients and makes the bread taste like, well, bread, but better. You'll add salt to the dough, and then often a sprinkle of flaky sea salt on top before baking is a must. It really makes a difference in the final taste.
The ratio of water to flour is pretty high in focaccia, which can make the dough feel really wet and sticky. Don't be tempted to add a lot of extra flour to make it easier to handle. That wetness is exactly what gives focaccia its signature airy texture inside.
Here's a quick rundown of what you'll generally need:
- Flour: All-purpose or bread flour
- Yeast: Active dry or instant
- Water: Warm, not hot!
- Olive Oil: Extra-virgin
- Salt: Fine sea salt for the dough, flaky sea salt for topping
Mastering The Focaccia Dough
Making focaccia dough isn't really about brute force or complicated techniques. It's more about understanding how the ingredients work together and giving the dough what it needs. You'll find it's a pretty wet and sticky situation, and that's exactly how it should be. Don't fight it!
Activating Your Yeast
First things first, let's get that yeast going. You'll need some warm water – think bathwater temperature, around 105-115°F. Too hot and you'll kill the little guys, too cold and they won't wake up. Mix your yeast with the warm water and a pinch of sugar (that's their food!). Give it a gentle stir and let it sit for about 5-10 minutes. If it gets foamy and bubbly, you're golden. If nothing happens, it's time for new yeast.
Mixing The Dough
Once your yeast is happy, it's time to bring in the flour and salt. You can do this by hand with a sturdy spoon or spatula, or if you have a stand mixer with a dough hook, that works too. Just mix everything until it's combined and you have a shaggy, sticky mass. Don't worry about kneading it smooth at this stage; we're going for hydration here.
The Importance Of Hydration
This is where focaccia really shines. The dough is intentionally wet and sticky. This high hydration is what gives focaccia its signature airy interior and tender crumb. It allows for those big, beautiful bubbles to form during baking. If your dough seems a bit too stiff, don't be afraid to add a tablespoon or two more of water until it reaches a soft, loose consistency. The goal is a dough that's more like a thick batter than a firm ball.
Handling Sticky Dough
Dealing with sticky dough can be a little messy, but it's totally manageable. The trick is to use plenty of olive oil. Lightly oil your hands when you need to touch the dough, and oil your bowl and your spatula. This prevents the dough from sticking to everything. When you're transferring it or folding it, think of it as more of a gentle coaxing than a forceful manipulation. It'll come away with a little oil and patience.
Here's a quick look at the hydration ratio:
| Ingredient | Typical Amount (by weight) |
|---|---|
| Flour | 500g |
| Water | 375g - 400g (75-80% hydration) |
| Olive Oil | 60g |
| Yeast | 7g |
| Salt | 10-15g |
Remember, flour types can vary in how much water they absorb. It's always best to go by the feel of the dough rather than strictly sticking to measurements if you're unsure. A wet, slightly slack dough is what you're aiming for.
The Art Of The Rise
First Rise: Creating Airiness
After you've mixed your dough and done those initial stretch-and-folds, it's time to let it rest. This first rise is where the magic really starts to happen. The yeast gets to work, munching on the sugars in the flour and producing carbon dioxide gas. This gas gets trapped in the gluten network you built, making the dough puff up and become airy. You want to find a warm, draft-free spot for this. Think of it like tucking your dough into a cozy blanket. It usually takes about 1.5 to 2 hours at room temperature for the dough to roughly double in size. Don't rush this part; it's building the foundation for that light, fluffy texture we all love in focaccia.
Second Rise: Developing Flavor
Once your dough has had its first big puff, you'll punch it down gently and transfer it to your baking pan. Now, it needs another rest, but this time it's a bit different. This second rise, especially if you opt for a longer, cold fermentation in the fridge, is where a lot of the complex flavors develop. The yeast activity slows down in the cold, but it continues to work, creating those nuanced tastes. If you're short on time and skip the fridge, this rise will be quicker, maybe 30-40 minutes at room temperature, and the flavor won't be quite as deep, but it'll still be delicious.
Room Temperature vs. Cold Fermentation
So, you have a choice to make. You can let your dough rise entirely at room temperature, which is faster, usually taking about 3 hours from start to finish. This will give you a good focaccia, light and airy. Or, you can go for the cold fermentation, which means after the initial mixing and stretch-and-folds, you pop the dough in the fridge overnight, or even for up to 48 hours. This slow, cold rise really deepens the flavor and can lead to a more open crumb structure. It’s a bit of a trade-off between time and flavor complexity.
Signs Of A Properly Risen Dough
How do you know when your dough is ready? It's not just about the clock. Visually, it should look noticeably puffed up, at least doubled in size from when you started. If you gently poke it with a floured finger, the indentation should spring back slowly, but not completely disappear. If it springs back immediately, it needs more time. If it collapses, it might have over-risen, but don't worry too much, you can still bake it. For the second rise in the pan, you're looking for it to fill out the pan and look bubbly on the surface, ready for those dimples.
The goal with focaccia rising is to create a dough that's full of air pockets. This happens through the yeast activity during the rise periods. A dough that's been allowed to rise properly will be light, airy, and have a wonderful texture when baked. Don't be tempted to rush it; patience here really pays off in the final bread.
Shaping And Baking Your Focaccia
Alright, so you've got this beautiful, bubbly dough. Now comes the fun part: getting it ready for the oven. This is where your focaccia really starts to take shape, literally.
Preparing The Baking Pan
First things first, you need to get your pan ready. A 9x13 inch metal pan is usually a good bet because it helps get that bottom crust nice and crispy. If your pan isn't non-stick, definitely line it with parchment paper. Some people like to grease the pan with a bit of olive oil, or even butter if using glass dishes, to make sure nothing sticks. It might seem like a lot, but trust me, you don't want your masterpiece glued to the pan.
Dimpling The Dough
Once your dough has had its second rise and looks all puffy and happy in the pan, it's time to dimple. This is a signature focaccia move. Drizzle a good amount of olive oil over the top of the dough. Then, get your hands a little oily and use your fingertips to press down firmly all the way to the bottom of the pan. Don't be shy here! You're creating those classic indentations that will hold all the delicious olive oil and toppings. You'll see some air bubbles pop, and that's totally fine – they'll turn into lovely little crispy bits when baked.
Oven Temperature And Baking Time
Preheating your oven is super important. Most recipes call for a hot oven, around 425°F (220°C). This high heat helps the focaccia puff up quickly and get that golden crust. Baking time can vary, but usually, it's about 20 to 30 minutes. You're looking for a beautiful golden-brown color all over. Keep an eye on it, though, because ovens can be a bit unpredictable. You can check out this guide for simple instructions on dimpling and baking.
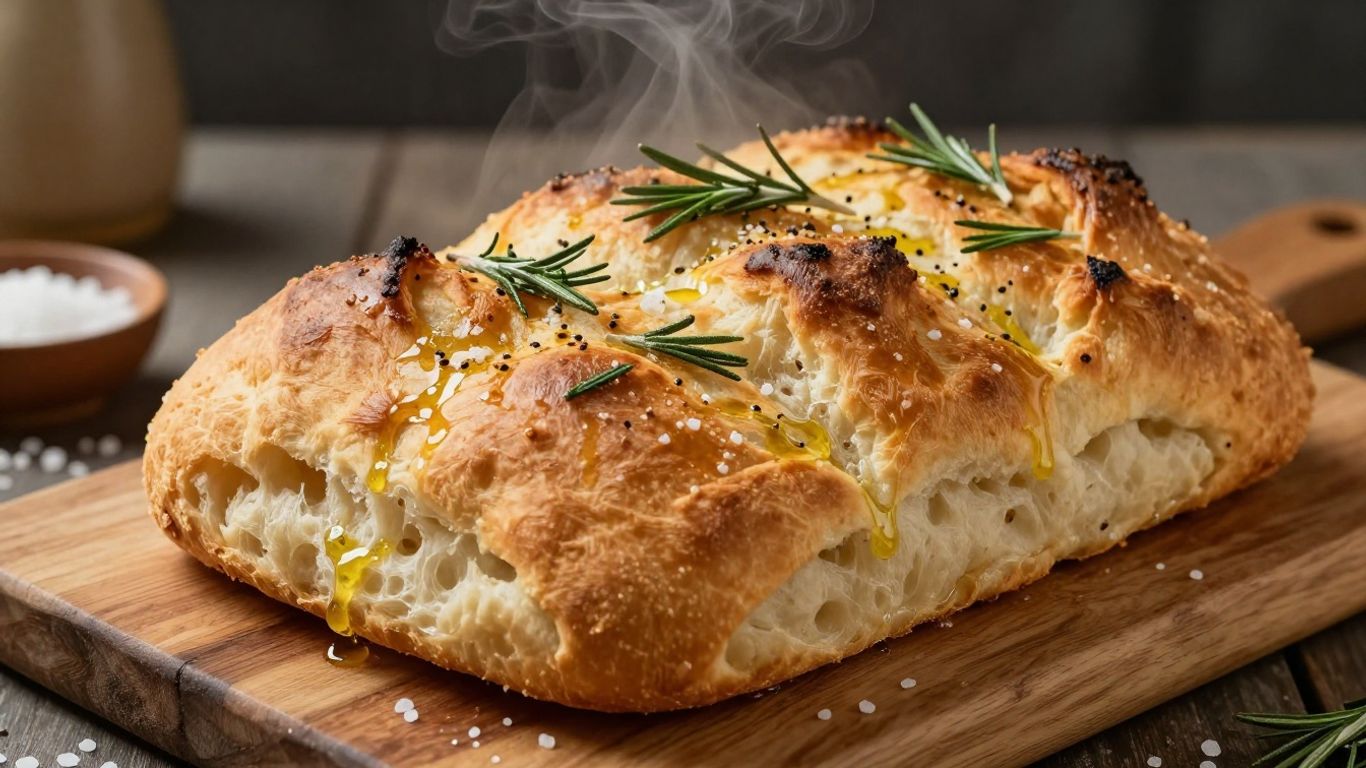
Achieving Golden, Crispy Edges
Want those irresistible crispy edges? Be generous with the olive oil, both in the pan and on top of the dough. The oil not only adds flavor but also helps create that wonderful texture. Using a metal pan also helps conduct heat more evenly, leading to a crispier bottom. After it comes out of the oven, some people like to brush it with a little more olive oil and water mixture while it's still hot. This adds a nice sheen and extra flavor. Let it cool for about 10-15 minutes before slicing – this little rest helps the inside stay soft and airy while the crust stays crisp.
Elevating Your Focaccia With Toppings
Alright, so you've got your focaccia dough ready to go, and it's looking pretty great. But what about making it really special? That's where toppings come in. They're not just for looks; they add so much flavor and texture to your bread. Don't be afraid to get creative here!
Classic Sea Salt and Rosemary
This is the OG for a reason. It's simple, it's elegant, and it lets the quality of your focaccia shine through. You just need some good quality flaky sea salt and a few sprigs of fresh rosemary. After you've dimpled the dough and drizzled it with olive oil, just scatter the rosemary leaves and sprinkle the salt all over. The heat of the oven will toast the rosemary and release its amazing aroma.
Creative Topping Combinations
If you're feeling a bit more adventurous, there are tons of ways to jazz up your focaccia. Think about what flavors you love. Here are a few ideas to get you started:
- Savory: Thinly sliced tomatoes with roasted garlic and a sprinkle of oregano. Or maybe some Kalamata olives and sun-dried tomatoes? You could even add some grated Parmesan cheese before baking for a salty, crispy crust.
- Sweet & Savory: Caramelized onions with a touch of thyme. This combination is just divine.
- Herbal: A mix of fresh herbs like thyme, oregano, and basil. You can add these towards the end of baking so they don't burn.
- Spicy: A few thinly sliced jalapeños or a pinch of red pepper flakes can add a nice kick.
Preparing Toppings for Baking
How you prepare your toppings makes a difference. For things like tomatoes or onions, slicing them thinly is usually best so they cook through evenly with the bread. If you're using garlic, roasting it beforehand brings out its sweetness. For herbs, fresh is usually preferred, but dried herbs work too – just use a little less as they have a stronger flavor. Remember, the goal is to complement the focaccia, not overpower it. You can find more inspiration for delicious focaccia topping ideas online.
When adding toppings, think about moisture content. Very wet ingredients might make the dough a bit soggy, so patting things like tomatoes dry before adding them can be a good move. Also, consider how long different ingredients take to cook. Delicate herbs are best added later in the baking process.
Tips For The Perfect Focaccia
Don't Add Extra Flour
This is probably the most common mistake people make. When you're mixing your focaccia dough, it's going to feel really wet and sticky. Resist the urge to dump in more flour to make it easier to handle. That stickiness is exactly what you want! It's the secret to getting those big, airy bubbles inside and a super soft texture. If you add too much flour, you'll end up with a dense, heavy bread, and nobody wants that.
Be Generous With Olive Oil
Olive oil isn't just for flavor here; it's a structural component. You want to use a good amount of olive oil in the pan before you even put the dough in. This is what helps create that amazing golden, crispy crust on the bottom and sides. Don't be shy with it! Also, a little drizzle on top before baking adds richness.
Let It Rise Properly
Focaccia needs time to develop its airy texture. Make sure you're giving the dough enough time to rise, both for the first rise and the second rise after you've put it in the pan. If the dough looks flat and uninspired before baking, it probably hasn't risen enough. Patience here really pays off. You're looking for a dough that looks visibly puffed up and jiggly.
Use A Metal Pan For Crispier Crust
While you can bake focaccia in pretty much any oven-safe pan, a metal one tends to give you the best results for a crispy bottom crust. Glass or ceramic pans can sometimes insulate the dough too much, leading to a softer bottom. If you're using a metal pan that isn't non-stick, just be sure to line it well with parchment paper and give it a good coating of olive oil.
A little trick for extra flavor and a beautiful sheen is to brush the focaccia with a mixture of olive oil and a tiny bit of water right after it comes out of the oven. It's still hot, so it absorbs it beautifully.
Here's a quick rundown of what to aim for:
- Dough Consistency: Wet and sticky, not stiff.
- Olive Oil: Plenty in the pan and a drizzle on top.
- Rising: Allow dough to double in size and become visibly puffed.
- Baking Pan: Metal pans are preferred for crispier crusts.
Enjoy Your Homemade Focaccia!
So there you have it – a simple way to get that amazing Italian bread right in your own kitchen. This focaccia is pretty forgiving, so don't stress too much if it's not absolutely perfect the first time. The important thing is that it tastes great, whether you're having it with dinner, dipping it in soup, or just snacking on it plain. Plus, now you've got a go-to recipe that you can tweak with your favorite toppings. Happy baking!
Frequently Asked Questions
What makes focaccia bread special?
Focaccia is a special Italian bread known for its soft, airy inside and a delightfully crispy, golden crust. It's usually flat and has a dimpled top, often flavored with olive oil and salt. It's super versatile and can be enjoyed plain or with various toppings.
Why is my focaccia dough so sticky?
Don't worry, a sticky dough is actually what you want for focaccia! This wetness is key to achieving that soft, airy texture inside. The trick is to oil your hands well when handling it, rather than adding more flour, which can make the bread dense.
How do I know if my yeast is still good?
To check if your yeast is alive and ready to make your bread rise, mix it with warm water and a pinch of sugar. Let it sit for about 5-10 minutes. If it gets foamy and bubbly, it's good to go! If nothing happens, it's best to get a new packet.
Can I make focaccia without a long rise time?
Yes, you can! While a longer, slower rise (like an overnight one in the fridge) really boosts flavor and texture, you can also let the dough rise at room temperature for about 1.5 to 2 hours until it doubles in size. It will still be delicious!
What's the best way to get crispy edges on my focaccia?
Using a metal baking pan instead of glass can help create a crispier bottom crust. Also, being generous with the olive oil in the pan and brushing a bit more on top before and after baking contributes to that wonderful crispy texture.
Are there any toppings that might burn easily?
Some toppings, like certain vegetables or herbs, can sometimes burn if not prepared correctly. It's a good idea to lightly coat any toppings you use with a little olive oil before putting them on the dough. This helps them cook evenly and prevents them from drying out or burning too quickly in the oven.


